


Toe Nail Press Ons: The Complete Pedicure Guide
Written by Elia, SHANGMENG Style Editor
A salon pedicure takes 30-60 minutes and costs $35-60. Toe nail press ons take 15 minutes and cost $12-18. The results — when you use the right product and apply correctly — are genuinely comparable.
Press-on toenails have been slower to trend than fingernail press-ons, but they've caught up. The core technology is the same: soft-gel tips in multiple sizes, adhesive tabs or glue, professional designs ready to wear. The application process is slightly different for toes, and there are a few toenail-specific considerations worth knowing. This guide covers everything.
Key Takeaways
- Toe nail press ons apply the same way as fingernail press ons but require toenail-specific sizing — toenails are wider and flatter than fingernails
- The big toe nail requires a different size (and sometimes shape) than smaller toenails — proper sizing is especially important for toes
- Toenail press-ons last 1-2 weeks with adhesive tabs and 2-3 weeks with nail glue — longer than fingernail press-ons due to less manual hand activity
- Thick socks and closed shoes create friction that can cause early lifting — apply the day before wearing open-toed shoes when possible
- SHANGMENG toenail kits include 32 nail tips in 16 sizes specifically designed for toenail dimensions
Why Toenail Press-Ons Are Different from Fingernail Press-Ons
Toenails and fingernails have meaningfully different geometry. Understanding this makes application much smoother.

Shape differences: - Toenails are wider and flatter than fingernails — especially the big toenail - The big toenail is often significantly wider than it is long - Smaller toenails (pinky toe especially) can be very small and curved in ways that make coverage tricky
Press-on differences that matter: - Toenail press-on kits are designed with wider, flatter tips to match toenail geometry - A fingernail kit will not fit toenails correctly — the curve and width ratios are wrong - Dedicated toenail press-on kits exist and are essential for a proper result
Wear considerations: - Toenails experience pressure from shoes and socks that fingernails don't - This means different adhesive considerations (more pressure = potentially longer hold OR more friction-caused lifting) - Open-toed shoes immediately after application vs. closed shoes affects hold significantly
For a complete overview of press-on toenail options and designs, see our full guide: Press-On Toenails & Pedicure Guide
What You Need for Toe Nail Press Ons
The Kit
Look for a toenail-specific press-on kit, not a fingernail kit:
| Component | What to look for |
|---|---|
| Toenail tips | Wider and flatter than fingernail tips; big toe size must be included |
| Size range | 12-16 sizes; toes vary significantly across people |
| Material | Soft gel for comfort in shoes; rigid ABS can feel uncomfortable underfoot |
| Adhesive | Both tabs and glue; see Adhesive section below |
| Tools | File, cuticle stick, alcohol prep pad (same as fingernails) |
Additional Tools for Toes
- Toenail clippers — trim natural nails to near-flush before applying
- Foot file or pumice — smooth any rough skin around nail edges that would prevent adhesive contact
- Cuticle oil — post-removal recovery
- Open-toed shoes — plan to wear these for the first few hours after application
Step-by-Step: How to Apply Toe Nail Press Ons

Step 1: Prep Your Toenails
- Remove any existing nail polish or previous press-ons
- Clip natural toenails as short as possible — trim close to the tip, leaving minimal white edge
- File the nail surface lightly with a 180-grit file to create texture for adhesive grip (do not remove material, just roughen slightly)
- Push back cuticles with the cuticle stick
- Use a foot file to remove any dry skin around the nail edges that might prevent the tip from seating flush
- Wipe each toenail with the alcohol prep pad. Wait 30 full seconds. This step matters more than anything else — oil on the nail surface is the primary cause of early lifting.
Step 2: Size Your Toenails
Start with the big toenail — it's the most important sizing decision:
- The press-on tip should cover the full width of the toenail without touching the skin on either side
- The tip should not extend more than 1-2mm beyond the natural nail tip (shorter than fingernails is usually better for toes)
- Between sizes: Go smaller. Skin overlap causes faster lifting than a slight width gap.
Work through all 5 toenails on one foot, then the other. Lay all 10 selected sizes out before applying any adhesive.
Step 3: Apply Adhesive
For adhesive tabs (recommended for beginners): 1. Select the tab size that matches your natural toenail 2. Peel the first backing paper 3. Apply the tab centered on the natural nail, pressing firmly across the full surface 4. Peel the second backing 5. Position the press-on tip, aligning it precisely at the cuticle edge
For brush-on nail glue: 1. Apply a small drop to the center inside of the press-on tip 2. Spread slightly with the brush (not to the edges — glue squeeze-out creates ridges) 3. Press immediately to the natural nail at the cuticle edge 4. Hold for 45-60 seconds with firm, even pressure
Step 4: Press and Seal
After positioning each tip: - Press firmly from the cuticle edge toward the free edge - Pay special attention to the side walls — this is where toenail press-ons are most likely to lift - For the big toenail: press across the width of the tip for 30-60 seconds - Use the cuticle stick to press down the edges at the side walls
Step 5: Allow to Set
Wait at least 30 minutes before putting on socks or closed shoes. Ideally, apply in the evening and sleep with open-toed slippers, then wear closed shoes the next day. The adhesive continues to strengthen for the first few hours.
How Long Do Toenail Press-Ons Last?

Toenail press-ons generally last longer than fingernail press-ons because toes aren't involved in hand activities that stress adhesive bonds. Here are realistic expectations:
| Adhesive | Wear Condition | Expected Hold |
|---|---|---|
| Adhesive tabs | Mostly open-toed shoes | 7-10 days |
| Adhesive tabs | Frequent closed shoes | 5-7 days |
| Brush-on glue | Mostly open-toed shoes | 14-21 days |
| Brush-on glue | Frequent closed shoes | 10-14 days |
Factors that reduce hold time: - Closed shoes with tight toe boxes (creates friction and pressure on the press-on edge) - Swimming or frequent foot submersion - Sweaty feet (moisture under the tip weakens adhesive) - Rough surfaces (tile floors without socks, gravel paths)
Factors that maximize hold time: - Open-toed sandals during the first 24 hours - Keeping feet dry as much as possible - Thorough alcohol prep before application - Brush-on glue rather than tabs for active lifestyles
Best Toenail Press-On Designs

Toenail press-ons come in the same design range as fingernail press-ons, but a few designs have proven especially popular for toes:
Classic French Pedicure
The white-tipped French manicure translates beautifully to toenails. The clean, simple design works in open-toed sandals without competing visually with summer outfits. French pedicure press-ons are the most universally appropriate choice.
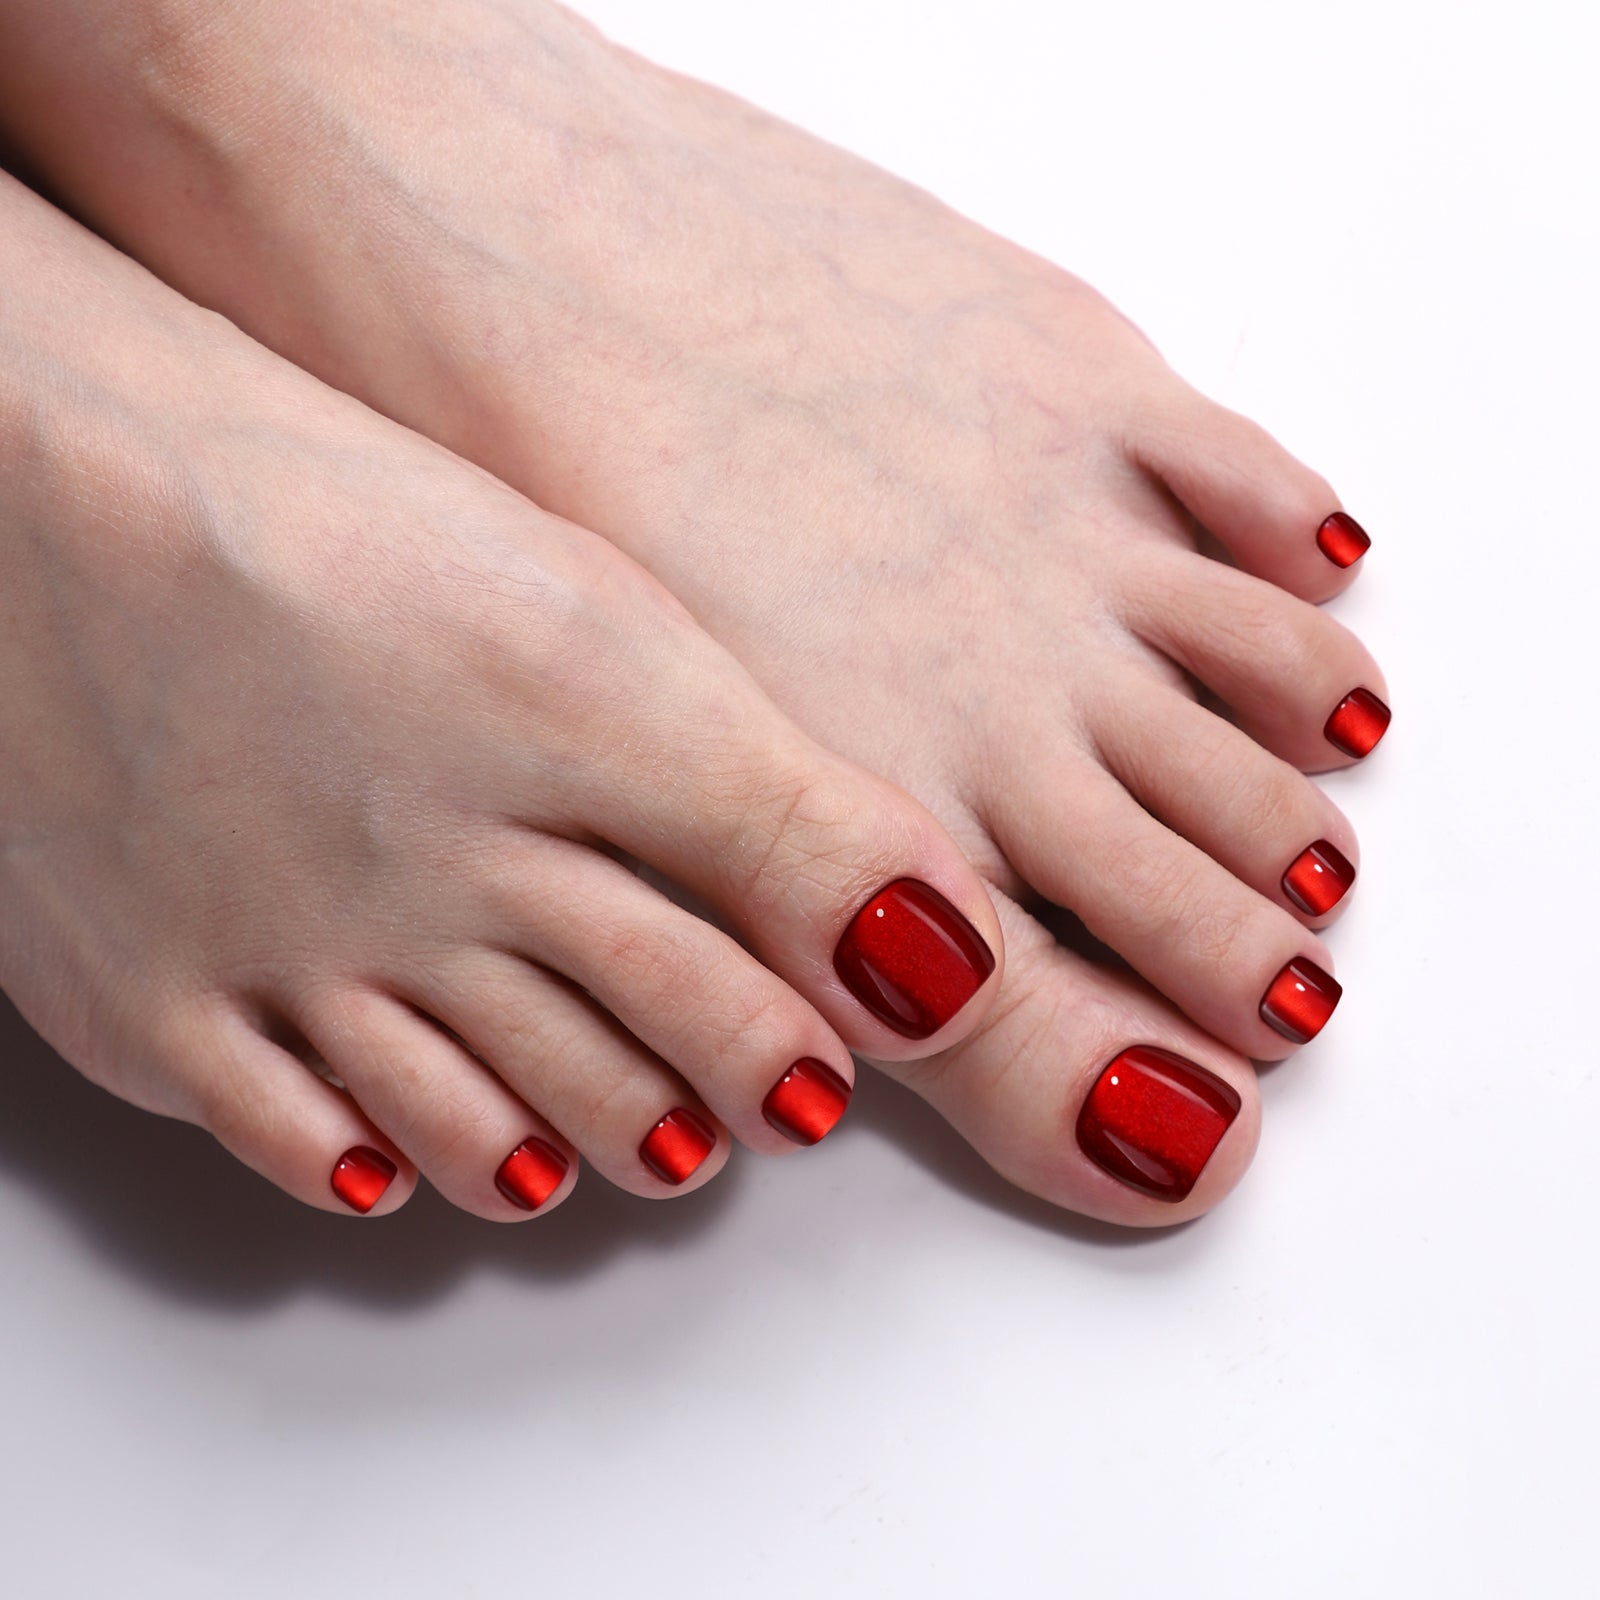
Solid Red or Deep Pink
The original pedicure color. Red toenails in sandals is a timeless summer look that never needs justification. Press-on solid red toenails in soft gel look indistinguishable from gel polish, particularly on the big toenail.
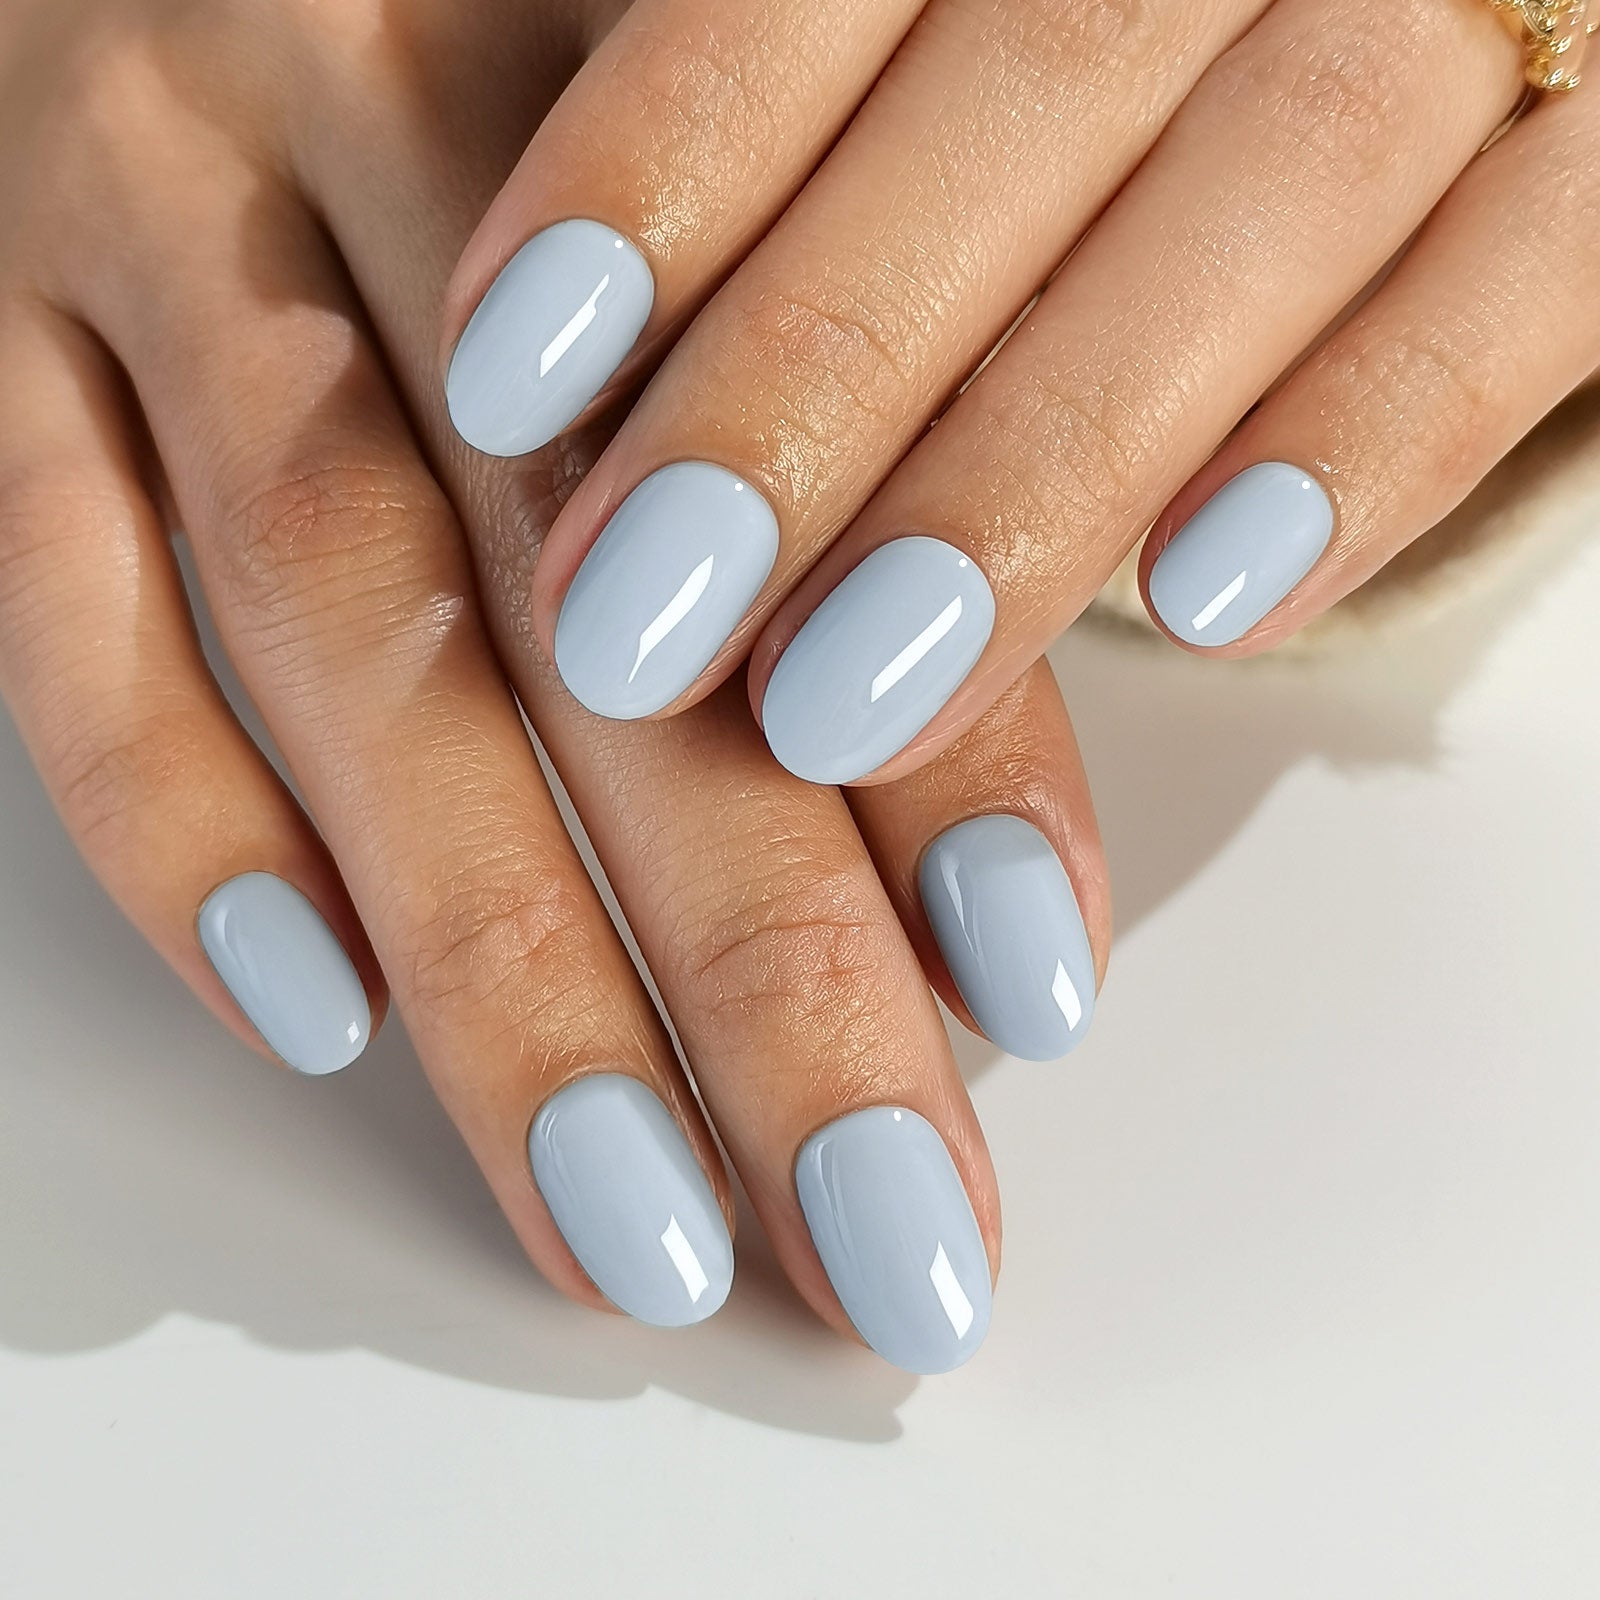
Nude or Sheer
Soft nude or sheer pink toenails look deliberately styled without drawing attention. This is the design for people who prefer their feet to look "done" without anyone being sure whether they are.
Glitter or Chrome Finish
For beach, pool, and summer events, glitter or chrome toenails catch the light in a way that solid colors don't. Chrome toenails in sandals photograph well and generate the same compliments as chrome fingernails.
Cat Eye Effect
Cat eye toenails — the magnetic shimmer stripe — look particularly interesting in open-toed shoes because the light plays off them differently as you walk. More unusual than classic designs but genuinely striking in person.
Explore More → Toenail Press-On Collection
How to Remove Toe Nail Press Ons
The removal process is the same as fingernails — the key is avoiding force:
For adhesive tabs: 1. Fill a foot basin or bowl with warm water 2. Soak your feet for 10-15 minutes 3. Use the cuticle stick to gently work under the side edge of each press-on 4. The tip will float off with gentle sideways pressure 5. No force, no picking
For nail glue: 1. Soak a cotton ball in acetone (100% pure works faster) 2. Place on each toenail and wrap with aluminum foil 3. Wait 15 minutes 4. The glue dissolves; the tip slides off 5. After removal, buff any residue gently and apply cuticle oil
Post-removal care for toenails: - Toenails benefit from a 24-48 hour rest between applications - Apply cuticle oil to the nail plate and cuticle edge - Trim and file natural toenails before the next application if they've grown
For detailed removal techniques: Press-On Toenails & Pedicure Guide
Toenail Press-Ons vs. Traditional Pedicure
| Toenail Press-Ons | Traditional Pedicure | |
|---|---|---|
| Time | 15 minutes | 30-60 minutes (+ travel) |
| Cost | $12-18/set | $35-65/session |
| Hold time | 1-3 weeks | 1-2 weeks (polish chips faster on toes) |
| Removal | 10-15 min at home | Next appointment or acetone soak |
| Skill required | Basic | None (professional applies) |
| Foot care included | No | Usually yes (scrub, massage, cuticle care) |
| Design options | Wide range | Wide range |
The cost comparison is significant. A traditional pedicure every 3-4 weeks = $450-800/year. Toenail press-ons at the same frequency = $160-240/year. The savings are real, though a traditional pedicure includes foot care services that press-ons don't replicate.
Many users use a combination: traditional pedicure every 6-8 weeks for the foot care, press-on toenails to maintain polish between appointments.
Frequently Asked Questions
Do toe nail press ons damage natural toenails?
No — when applied and removed correctly, toenail press-ons don't damage natural toenails. The risk of damage comes from forced removal (pulling or prying without soaking), which can lift the top layer of the toenail plate. Using warm water soak (for tabs) or acetone wrap (for glue) to dissolve the adhesive before removing prevents this. Toenails are generally thicker than fingernails, making them slightly more resilient to application stress.
Will toenail press-ons stay on in sandals and during summer activities?
Toenail press-ons applied with brush-on nail glue and proper prep hold well through normal summer activities including sandal-wearing, light water exposure, and outdoor events. For swimming: press-ons can handle occasional brief water exposure but prolonged swimming (30+ minutes repeatedly) will weaken the bond over time. Beach sand can cause friction on the edges; rinse feet after beach time and dry thoroughly.
Can I wear toenail press-ons if I have narrow or wide toenails?
Yes — toenail press-on kits designed with 12-16 sizes cover most toenail widths. The key is a toenail-specific kit (not a fingernail kit) with enough size options. Wide toenails need tips wide enough to cover the full width without the press-on pressing into the nail edges; narrow toenails need the right narrow sizes. If a standard kit doesn't include your size, brands offering half-sizes or custom sizing are an option.
What's the best adhesive for toenail press-ons?
For daily wear and maximum hold: brush-on nail glue with thorough prep (alcohol wipe, buffed surface). For events or shorter wear periods: adhesive tabs, which are easier to remove without acetone. For active lifestyles (gym, sports, lots of walking in closed shoes): brush-on glue is more stable. For sandal wearers who want easy removal: tabs are sufficient for the 5-10 day cycle and remove cleanly with warm water soak.
Do I need a special kit for toenails?
Yes — use a kit specifically designed for toenails, not a fingernail kit. The reason is sizing: toenail tips are wider and have a different curve than fingernail tips. A fingernail kit will produce tips that either don't cover the full toenail width (especially the big toe) or sit incorrectly on the nail plate curve. SHANGMENG toenail kits are sized and shaped for toenail geometry.
Toenail press-ons are one of the most practical beauty products available: they deliver a professional pedicure result in 15 minutes, cost a fraction of a salon visit, and last as long or longer than traditional nail polish. The key is using a toenail-specific kit, sizing correctly, and giving the alcohol prep the full 30 seconds it needs. Everything after that is 15 minutes and open-toed sandals.


Share